 |
Photography |
 |
Greetings from JacknBarb (TJ and Boo Boo) Are you planning a long distance hike? |
||
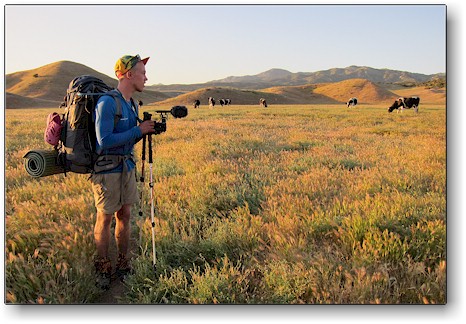
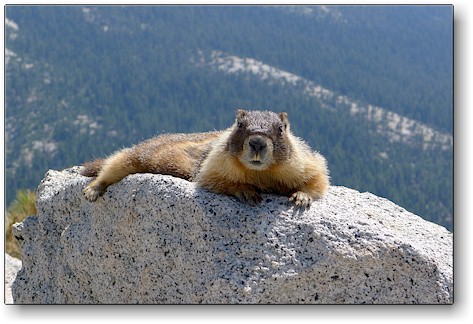
PCT hikers - Note: There is a good chance that someone thru hiking the PCT during your year will be producing a class video. Your images will help make it a hit and a life-long treasure. Take lots of great pics and HD video! Photography for backpackers: The first consideration is what do you plan to do with your images and movies? Just keep them in a phone to show friends? Make a DVD with music of your journey or sell your best images online? And, what will you take to capture these images? The minimalist may choose to merely take pictures with their phone. Others will carry a small point and shoot camera and still others will take the big professional (and heavy) models along with a full size tripod. If you are going on a five month hike, shouldn't you document it as best as you can? Even if you don't have any plans for the images now, you might in a few years. We won't tell you which to choose but there are advantages and disadvantages of each. Using your cell phone - Generally your phone will be turned off to conserve battery power. Check your phone to see how long it takes for you to turn on your phone, enter your password (if it is required), choose the camera app and frame and shoot a picture. Our phones take a minimum of 40 seconds! If you choose to use a cell phone, you likely will miss some very good shots like the one above and this one, taken by Bert and Ernie. Also think of storage. Your cell has limited data storage. What will you do when the phone is full? Will you upload huge data files to the cloud at the town stops? How many extra batteries or supplemental power sources will you carry? You can see, we do not recommend using your cell for image aquisition. **Side note: If you do shoot HD movies with your cell phone, hold the phone horizontally not vertical so the movie will properly fit the dimensions of an HD TV. We suggest you carry your cell in a lightweight case and pack the case in a pack pocket (hip belt, zippered is a great place to carry one). We carried our phones in old cloth, zippered sunglass cases. The only advantages of using your phone is 1) to save a bit of weight and 2) ease of sending images up to social media once you find reception or wi-fi. The Professional Gear: You will get the best images of all but set up time, lens changing and using a tripod will add lots of time to your hike. This is recommended only for someone whose main goal is to document their trip with the ultimate in image quality. Plan to carry a lot of extra weight. The small point and shoot cameras: We feel this is the best solution. Our small Cannon elph weighed in at 5 ounces and spare batteries were an additional 0.6 oz. We also carried the battery charger (2 oz) and recharged all batteries in towns. It takes 1-2 seconds to turn it on and take a picture. The camera is carried always in the same pocket (not a shirt pocket as it might fall out when you bend over). In a five month thru hike of the Pacific Crest Trail I used about 60 gigabytes of memory (see more on that below). You have hiking poles, right? and a point and shoot camera - Get a Stick Pic! $14. We also carried a gorrilla pod (original) It makes your selfies and group photos so much better! Learn to use the self timer in your camera. If it has a custom mode, like 3 shots with a 15 second delay, use it and have the people in the pictures change poses or positions. Our Cannon had a custom 30 second delay - enough time to climb to the head of the Eagle at Eagle Rock (we used the gorilla pod too). In the camera menu, set the date and time to your current time zone. Turn off that annoying date stamp that appears at the bottom of each image - the date and time will be included with the digital image information. Set your still image size to wide screen 16:9 and the highest resolution possible. You can always make a large image smaller but not the other way around. When resizing images, resave the smaller one with a new file name so you can keep your original. Data cards are inexpensive. Get a bunch of them. Make sure they are Class 10 (fast). If you record movies, again, set the resolution to wide screen and HD. Before you start, put each data card in your camera and take a picture of a page that has your name, phone number and email address. If your camera or flash media get lost, someone may see this picture and contact you! Add your trail name to this page if you have one. Practice using your fill flash and use it particularly when your subject is in a shadow (like a shadow on the face). The flash also works well when you are in self timer mode as you know right when the picture is being taken and it may provide an additional pause between multiple shots. It is always good to review your flash pictures. If you are too close to the subject, the flashed image may be too washed out. If you shoot a campfire at night, it is best to hold the camera very still (or use the "pod") and shoot with the flash off. Using the flash will make the fire pretty much disappear. Finally, read the instruction book that comes with your camera. It is not rocket science but you may find that your camera does some very cool things! We do not recommend using the special filters with your pictures though - all the filtering, even black and white, can be done with your color images after you return home (using a basic image editor). When sending pictures electronically, your large images are just too big to send so you should reduce the image to a manageable size, like 600X800. Some cameras can resize through the camera menu - do resave the smaller size as a new file, like DSC1214-sm (for small). Do not write over your original large file or it will be lost forever. We used some mini HD cards with an adapter and were able to insert the mini card in our phone (Samsung) to resize and upload images taken with our camera. Some cameras can create their own wi-fi and allow you to seamlessly transfer images from your camera to your phone - even when you are in the woods, but wifi uses more power! Practice making image transfers before you leave so you know what to do. Look into the possibility of backing up your images. Upload them to the cloud when you have wi-fi? Burn them to a DVD and mail the disks home? If you do not back them up, store the used cards in a waterproof zip lock and in a very safe place in your pack. Note - Test the "cloud" upload site before you plan to use it. Some of these places will automatically reduce the size of your image and you can no longer retreive the original. Once you upload to the cloud, download an image and check out the image size and quality. Bottom line, it is always good to save your originals on some hard media and backup at two locations. Scenery shots are great but the images you will cherish the most will be those with other people. Take time to get the shots. Set up group photos! When shooting video, try not to zoom in and out too much and don't pan (move) the camera too quickly from side to side. Slow smooth motions are best. Run a few seconds before and after every video clip as well. It may sound stupid, but take a picture of your campsite every day. You will have a time stamp on the file and you will remember each and every spot! "Oh yeah, remember that place, the wind was blowin' like a mo-fo!" Condor took pics of his face every day and made this fun video. and here is another great idea, shot of the hiker and the scenery, every mile of the trail! Finally, you may be on a mission to get to Canada but find the time each day to take pictures! If you have any questions, comments or exceptional resources on this topic, contact us. |
||
Contact Us: JackandBarbPCT@gmail.com |
||